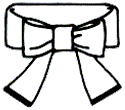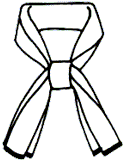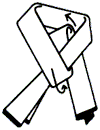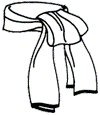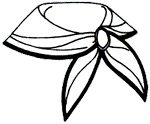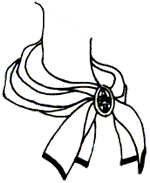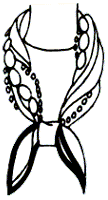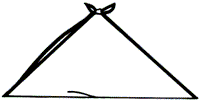
How to Make an Asset Out of an Accessory…

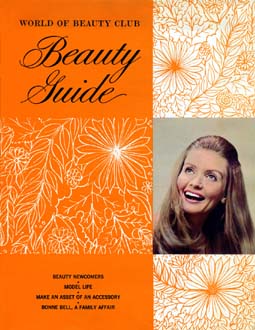
Source: Beauty Guide Magazine published circa 1969 (or early 1970s) from World of Beauty Club.
The article was based on a booklet from Echo Scarfs, Inc.

World of Beauty Club - Beauty Guide


Page Contents:


Introduction

Of course you own a collection of scarfs – large and small squares, long and short rectangles. You tie them over your head; you loop them around your neck; you knot them casually under your coat. But there’s more to a scarf than just that. It’s not only functional but fashionable. It is not just an accessory, it can be the all-important finishing touch, the distinctive accent that adds personality and style to whatever you are wearing.

To show the many possibilities in a scarf, the well-known firm of Echo Scarfs, Inc. has brought out a booklet with directions for folding and tying every size and shape. With their permission, your Beauty Guide is passing along some of their expert suggestions.

Take one of your favorite scarfs, follow the instructions and add a whole new look to your dress or suit or shorts. In the words of Echo – “Be scarf-happy.”


Ways to Fold a Scarf

There are three basic ways to fold a scarf – triangle, bias, and oblong. These are the three shapes you will be using.
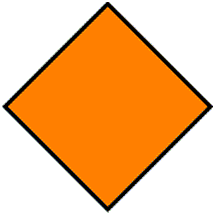

Scarf Triangle Fold

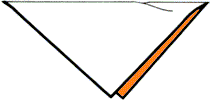
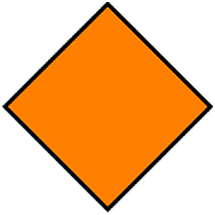
Scarf Triangle Fold Step 1
  1. Place scarf on flat surface, with wrong side up and point toward you.
Scarf Triangle Fold Step 2
  1. Fold opposite point toward you to meet with point close to you.

Bias Fold

Scarf Bias Fold Step 1
  1. Place scarf on flat surface, with wrong side up and point toward you.
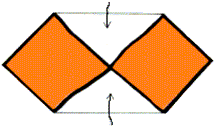
Scarf Bias Fold Step 2
  1. Fold points to meet in center.
Scarf Bias Fold Step 3
  1. Fold (edge close to you) ¾ away from you.
Scarf Bias Fold Step 4
  1. Fold opposite edge toward you ¼ to meet.
Scarf Bias Fold Step 5
  1. Fold opposite edge, again toward you, to outer edge.
    If you want it even narrower continue.
Scarf Bias Fold Step 6
  1. Fold again in half.

Folding a Square into an Oblong

Scarf Oblong Fold Step 1
  1. Place scarf on flat surface, with wrong side up.
Scarf Oblong Fold Step 2
  1. Fold (edge close to you) away ¾.
Scarf Oblong Fold Step 3
  1. Fold opposite edge toward you, to outer edge.
Scarf Oblong Fold Step 4
  1. Fold again, in half.

Scarf Your Neck


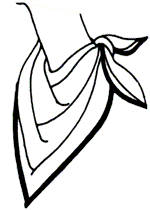
The Square – Square Knotted!

Fold into a triangle (use large or small square).

Scarf Square Knotted Step 1
  1. Right end over left and tie.
Scarf Square Knotted Step 2
  1. Left end over right and tie.
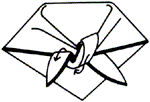
Scarf Square Knotted
  • Place knot on shoulder or front.
Scarf Square Knotted Cowboy Fashion
  • Place knot at back of neck “cowboy fashion.”

The Square – Tied Loosely

Fold into a triangle (use large or small square).

Scarf Square Loose Tie Step 1
  1. Right end over left (no knot) tie.
Scarf Square Loose Tie
  • Arrange to suit your outfit.

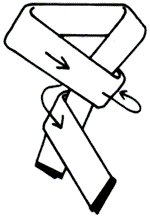
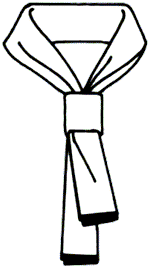
Necktie

Use a large square (at least 31") folded on the bias; or use an oblong scarf folded narrowly.
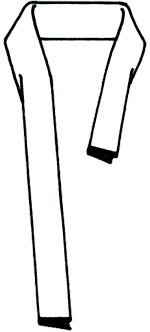
Scarf Necktie Step 1
  1. Make the left end shorter than the right.
Scarf Necktie Step 2
  1. Hold left end with left hand and wind right end around left two times.
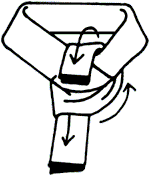
Scarf Necktie Step 3
  1. Still holding right end in right hand, pull right end up through the V and down the loop.
Scarf Necktie Step 4
  1. Hold left end in left hand and push knot with right hand up.

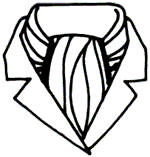
Ascot

Fold large or small square into a triangle, oblong or bias; or use an oblong scarf folded narrowly.
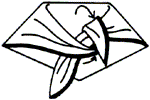
Scarf Ascot Step 1
  1. Right end over left and tie (no knot necessary).
Scarf Ascot Step 2
  1. Spread open the gathers and tuck in open neckline.

Shirred Fill-in

Use large or small square and place on flat surface wrong side up.

Shirred Fill-in Scarf Step 1
  1. Pick scarf up at center and tie a small knot.
Shirred Fill-in Scarf Step 2
  1. Turn scarf to right side and fold into inverted triangle.
Shirred Fill-in Scarf Step 3
  1. Place around neck and tie knot at back of neck.

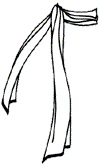
Oblong Scarf

The oblong scarf, ranging in size from 45" long (regluar oblong) to 66" (extra long) is a very versatile style.
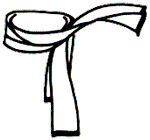
Wear it as a muffler:

Muffler Regular Oblong Scarf
Regular Oblong
Muffler Long Oblong Scarf
Long Oblong

Wear it tied loosely on the shoulder:

Regular Oblong Scarf Loosely on the Shoulder
Regular Oblong
Long Oblong Scarf Loosely on the Shoulder
Long Oblong

Try intertwining more than one scarf,
using a contrasting color or print:

Intertwined Oblong Scarfs Loosely on the Shoulder

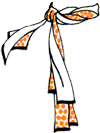
Tie it in a “pussy cat” bow, either high or low:

Oblong Scarf Worn with a Pussy Cat Bow

Wear it tied in a square knot, either high or low, giving a “sailor” effect:

Oblong Scarf Worn with a Sailor Effect

The “Poof”

Use regular or extra long oblong scarf.
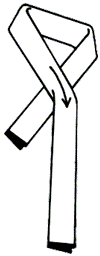
The Poof Scarf Step 1
  1. Scarf around neck – make the right side longer than the left.
The Poof Scarf Step 2
  1. Right side over left side, then bring right side up through the V with left hand while right hand holds left side and tighten.
The Poof Scarf Step 3
  1. Poof up the loop.

Through the Loop

Fold oblong narrowly (use a regular or extra long oblong).

Through the Loop Scarf Step 1
  1. Fold in half.
Through the Loop Scarf Step 2
  1. Put the scarf around your neck and pull the ends through the loop.
Through the Loop Scarf Step 3
  1. Pull as tightly or loosely as you like and let the ends drape on the shoulder.

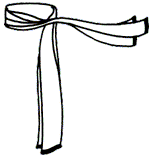
Stock Tie

Fold oblong narrowly; or large square on the bias.
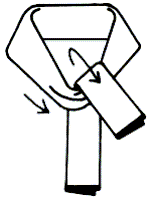
Stock Tie Scarf Step 1
  1. Tie right end over left (as in triangle “tied loosely”).
  2. Spread open the gathers.
  3. Adjust the ends neatly.

Another effect can be achieved by using the extra long oblong.
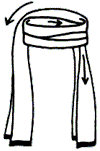
Stock Tie Extra Long Oblong Scarf Steps 1-2
  1. Fold narrowly.
  2. Wrap around the neck once. Make sure the ends are even.
Stock Tie Extra Long Oblong Scarf Steps 3-5
  1. Tie right end over left.
  2. Spread open the gathers.
  3. Adjust the ends neatly and add a pin to hold in place.

The Ring Scarf

The Ring Scarf

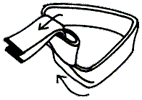
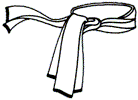
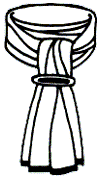
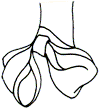
Put ring over head and drape around neck. Add a pin for fun!

The Ring Scarf The Ring Scarf The Ring Scarf

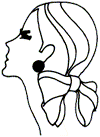
Knot ring in center and it becomes a bow. Attach it to the neckline of a dress, or wear it in your hair.


Scarf Your Shoulder

Use an oblong scarf folded narrowly. Knot in the center and tack on the shoulder of a dress, suit or coat.
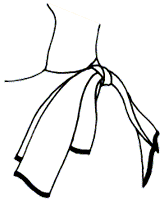
Shoulder Scarf

Scarf Your Waist

An extra long oblong scarf tied around the waist becomes a sash.
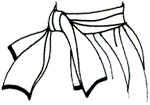
Oblong Scarf Sash

Fold large square scarf into a triangle.

Square Scarf Sash Tie triangle around waist, knot at side.
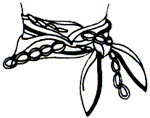
Intertwined Square Scarf Sash Intertwine chains or beads for another effect.

Scarf Your Head and Hair


Headband

Use a large square folded into an oblong, or a smaller square folded on the bias, or an oblong scarf folded narrowly. Put around head and tie knot in back or to the side.
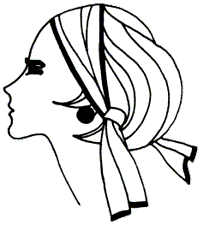
Headband Scarf

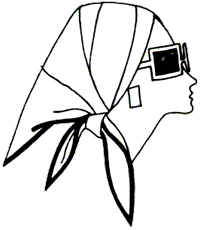
Kerchief

Use a large or small square folded into a triangle.
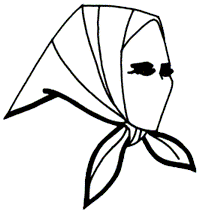
Kerchief Scarf Tie Front
  1. Place over head and tie under the chin, or
Kerchief Scarf Tie Back
  1. Place over head and tie in the back.

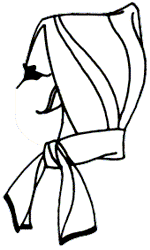
Dutch Cap

Use a large square (at least 31").

Dutch Cap Scarf Steps 1-2
  1. Place scarf on flat surface, wrong side up.
  2. Fold scarf in half, away from self.
Dutch Cap Scarf Step 3
  1. Fold top layer back (toward self) in half.
Dutch Cap Scarf Steps 4-5
  1. Grasp folds at corners of bottom edge with fingers and flip scarf over. (Don’t remove fingers – keep in place through step 7).
  2. Bring the two corners down to meet at center edge.
Dutch Cap Scarf Step 6
  1. Roll edge ½ way up.
Dutch Cap Scarf Steps 7-8
  1. With fingers still in place, grasp scarf, pick it up and place on head.
  2. Tie under chin.

Turban

Using an extra long oblong scarf, wrap around head leaving enough to tie a knot.
   – or –
Place on head and tie knot behind the ear allowing the ends to drape on the shoulder.
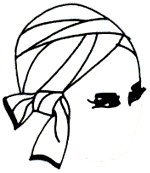
Turban Scarf

Coordinate Scarfs with Jewelry


Add a Pin

Scarf with Pin Fold a large or small square into a triangle. Instead of tying – add a pin!
Scarf with Pin to the Side An oblong scarf folded narrowly or a square on the bias is also effective. Wear to the side for a different appeal.

Wear Beads

Scarf with Beads Wear beads – a different way! Intertwined with a regular oblong scarf. This look can be achieved by coordinating beads and chains with any of the ways previously shown.

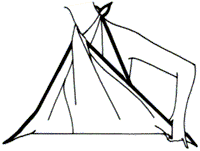
Surplice Bodice

Surplice Bodice Scarf Step 1
  1. Use large square (at least 31"). Tie opposite points in a knot forming triangle.
Surplice Bodice Scarf Step 2
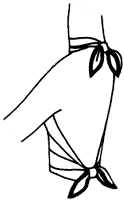
  1. Slip over head.
Surplice Bodice Scarf Step 3
  1. Tie bottom two corners around midriff in a knot in the back.

Care of Your Scarfs

Cleaning

100% pure silk must be dry cleaned.

Storage

Fold into a small rectangle, place in drawer standing up (folded part up). Arrange by color. This way you can see your scarf at a glance without fumbling through piles.


Want more scarf tying information? Here’s the KAT's TAIL scarf pages index:


Free Web Hosting